- 6/21/2025
- 12 min read
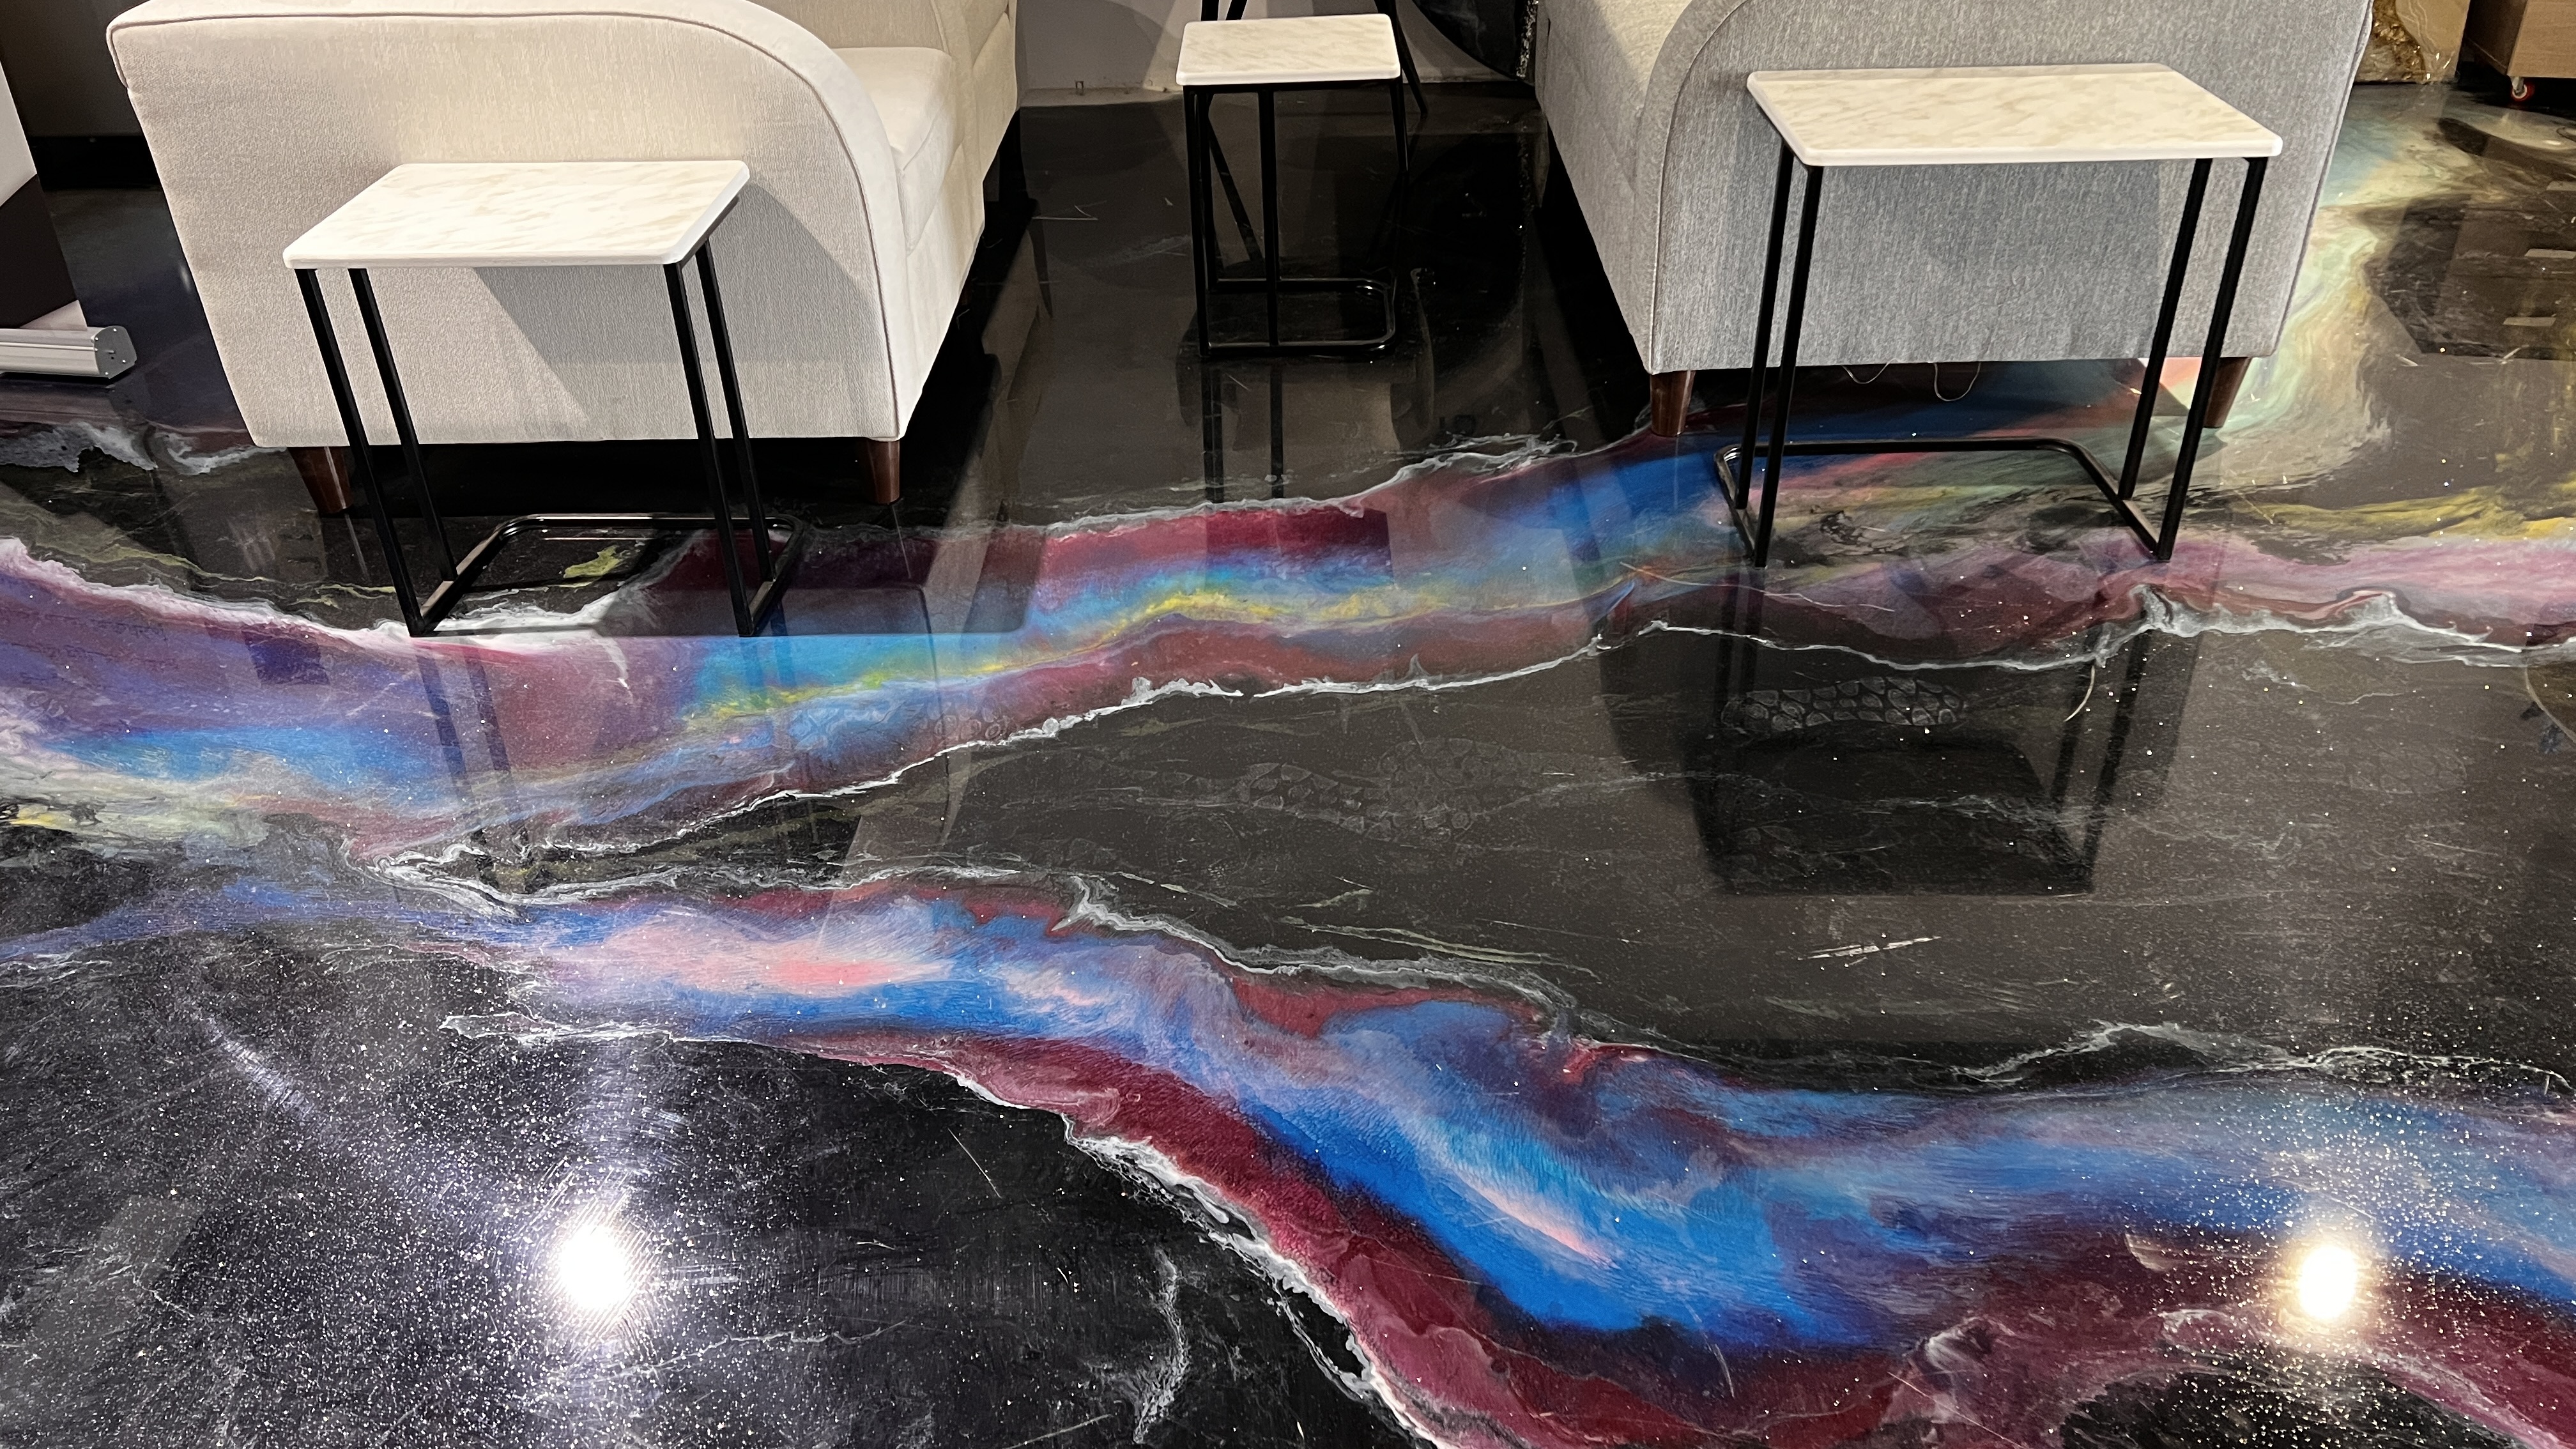
Resin Flooring
How to Install Resin Flooring Yourself Using Graffiti Resin Products
Simple Steps Without Demolition or Mess
Looking to renovate your home or office floor without the hassle of demolition and debris?
Graffiti Resin flooring offers you a modern, easy-to-install solution with stunning results.
In this article, we’ll guide you step-by-step to apply resin flooring on your own or with the help of a technician—without removing your existing tiles or using heavy equipment.

✅ Why Choose Graffiti Resin Floors?
-
Can be applied directly over old floors (tiles, marble, or concrete)
-
No demolition or removal of the existing surface needed
-
Slip-resistant and waterproof
-
Provides a smooth, glossy, and durable finish
-
Available in vibrant colors and 3D designs
✅ Materials & Tools You'll Need:
-
Two-component Graffiti Resin (Parts A & B)

-
Electric mixer
-
Mixing container
-
Digital scale
-
Squeegee and roller
-
Painter’s tape (for edge protection)
-
Gloves
-
Resin-safe shoes
-
Heat torch (for bubble removal)
-
Optional: Resin dyes or 3D floor stickers
(*All materials and tools are available exclusively at Graffiti Resin.)
✅ Step-by-Step Guide to Resin Floor Installation:
1️⃣ Surface Preparation:
-
Clean the floor thoroughly from dust, grease, or debris.
-
If there are cracks or uneven areas, apply a self-leveling compound to smooth the surface.
-
For tiled floors with deep grout lines, fill gaps with special paste to prevent resin from seeping through.
2️⃣ Mixing the Resin:
-
Carefully read the instructions on Parts A & B.
-
Add Part B (hardener) to Part A (resin) according to the specified ratio.
-
Add Graffiti Resin color pigment if desired.
-
For 3D effects, place a sticker design under the clear resin layer.
-
Mix gently using an electric mixer for 3–5 minutes until fully blended and bubble-free.
3️⃣ Pouring & Spreading:
-
Gently pour the mixture over the surface.
-
Use a squeegee to spread it evenly.
-
Roll over the surface to ensure smooth distribution.
-
Carefully pass the heat torch over the resin to remove surface bubbles.
4️⃣ Curing Time:
-
Let the floor dry for 24–48 hours, depending on room temperature.
-
Avoid walking on the floor during this period.
-
Once fully cured, enjoy a glossy, flawless finish.
Learn how to professionally apply resin flooring in indoor spaces.
🎥 Watch the tutorial video : https://youtu.be/GJqMm3YUs2Q?si=_qQf2sRufnxWa20a
✅ Frequently Asked Questions:
1. Do I need to remove the old tile floor?
No, resin can be applied directly on clean, stable tile.
2. Can I apply the floor myself?
Yes! With a few simple steps and guidance from our team, it’s doable.
3. Are the materials safe for indoor use?
Yes, our products are designed for interior spaces and don’t emit strong odors.
4. How long does it take to dry?
Between 24 to 48 hours, depending on temperature and resin thickness.
5. Can I choose a custom color?
Absolutely! We offer a wide range of colors and design options.
6. Is it suitable for daily use and humid areas?
Yes, it’s slip-resistant, waterproof, and durable for everyday use.
7. What is the lifespan of a resin floor?
When applied correctly, it can last 5–10 years or more.
8. Can I install it in bathrooms?
Yes, but we recommend consulting our team to ensure proper adhesion.
9. How do I clean it?
Use warm water and mild, non-corrosive cleaners—easy and hassle-free!
10. Do I need special tools?
Yes. The required tools are listed above and available in ready-to-use kits from Graffiti Resin.
✅ Need Help or Free Consultation?
The Graffiti Resin Projects Team is ready to support you step by step.
📞 Contact us via WhatsApp or book a free consultation call:
+966 58 010 7729